We're no longer updating this content. Check QuickFile Version 6 for information about this product.
How to change your DPI settings for Windows XP
1.) Right-click on an empty area on your desktop and go to Properties->Settings->Advanced
If the General tab is not displayed, click on it.
You will see a screen similar to the one shown below.
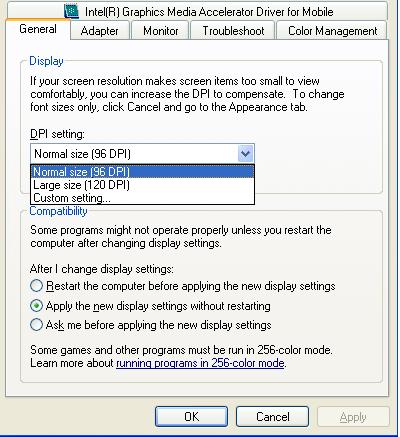
2.) In the DPI Setting drop down box, select Normal size (96 DPI)
3.) Click on OK when done.
4.) You most likely be prompted to reboot the computer for the settings to take effect. Select YES to reboot your PC.
If you are not prompted to reboot your PC, reboot your PC anyway as this is needed to reset the DPI setting.
How to change your DPI settings for Windows 8, Windows 7 and Windows Vista
1.) Right click on a empty area of your desktop and click on Personalize.
NOTE: For Win8 users, you must access the Desktop as right clicking on the Start page will not bring up the menu.
This screen should be displayed:
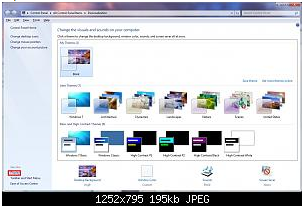
2.) Towards the bottom left corner, click on the Display link. (see red box in screen shot above). This will display the DPI settings screen (see below)
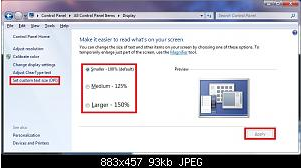
3.) Change the Display DPI setting to Smaller - 100% = 96 DPI (Pixels/Dots Per Inch)
4.) Click on the Apply button.
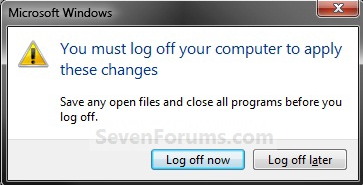
5.) Click on the Log off now button to apply the DPI changes. (See the screenshot below.)
WARNING: This will log you off immediately. Be sure to save anything you are working on before you click on this.
6.) After the PC reboots, log back on.